How to Declutter Your Home
18 Tips to Clean Out Every Room

Decluttering Tips for Home and Life
Everyone has a bit of junk lying around the house — and most of us have more than a little. Household clutter seems relatively harmless. But many people feel stressed and like life is out of control when they surround themselves with more things than they can manage.
Decluttering your home and taking care of the mess is a way to take better care of yourself. According to a survey conducted by Budget Dumpster, 75% of Americans have completed a decluttering project in the last year.
In our ridiculously thorough how-to guide, we’ll help you get started on your own decluttering project. You’ll learn how to clean up any space in your home with organizing ideas and decluttering tips from the industry’s leading experts.

Just want to start decluttering? Jump right to our room-by-room declutter checklist.
What Is Decluttering?
Decluttering is the process of making room in your home for the things that truly matter. To distinguish valuable items from the stuff that’s just taking up space, you must have a basic understanding of what clutter is.
Defining Clutter
Clutter is anything you’re keeping that doesn’t add value to your life. It takes on many forms, from unused lawn equipment crowding your garage to children’s toys you’ve held onto for years. Whatever clutter looks like to you, it’s important to get rid of it when you start to feel it’s boxing you in or cramping your living space.
When Clutter Becomes a Problem
Clutter is an energy zapper. How much time have you wasted looking for things you can't find? In our survey, 48.5% of respondents agreed that unwanted clutter in the house made them feel stressed. Another 42.5% of respondents said clutter makes them feel embarrassed. In extreme cases, depression can result when a life of consumption extends beyond “stuff.” In serious hoarding situations, mental and physical health complications are possible, for instance if mold and dust are present. A house full of clutter could even cause fire hazards.
When It’s Time to Declutter
If you can't remember the color of your kitchen counters because it's been so long since you've seen them, it’s probably time to declutter. Getting rid of junk frees up extra space in your home that wasn’t there before and helps you feel more organized. You may also need to purge your house of clutter before a move. Whatever your reason is for organizing your home, and in turn decluttering your life, this ridiculously thorough guide will walk you through the process.
Why Decluttering Can Feel Difficult
For many people, even starting the declutter process is overwhelming. For others, it’s difficult to get rid of sentimental items. But at the end of the day, it only makes sense to keep the things that actually serve a purpose in your home. By purging items you no longer use, you’re more likely to focus on the present than live in the past.
“Decluttering is all about honoring who we are in the now. Often times when we go through items and try to ‘make room,’ we get stuck in who we were in the past. This could show up as a hobby we've outgrown, a pair of pants that are less than flattering, or anything that doesn't reflect our current wants or needs.
By first checking in with ourselves and our goals, the decluttering process becomes as simple as, does this item honor my life right now? Does it reflect my current lifestyle and habits? By reframing some of these questions, we don't fall into a place of serving someone we once were, but serving who we are right now.”
Laura Kinsella, Professional Organizer and Founder of Urban Organyze

3 Reasons to Declutter Your Home
These are the top three reasons why people decide to start a decluttering project.
1. You Want to Join the Minimalism Movement
They say less is more, and that saying couldn’t be more true today. The minimalism movement focuses on memories, friends and family — anything that has lasting value — over material possessions. People who consider themselves minimalists strive to lead a simpler, easier lifestyle. A big part of that is paring down possessions to just those you truly need and add value to your life. According to UCLA, the most stressed-out people have more stuff in their home than they can keep track of. The minimalism movement provides a helpful mindset for those trying to ditch that stress.
2. You’re Preparing for the Next Stage of Life
Whether you’re expecting a new baby or moving your kid off to college, decluttering helps you make the next step. By getting rid of excess stuff, you can easily turn your spare room into a children’s bedroom or a make-shift gym. Moving into a smaller home? You have to declutter first, then you can downsize. Cleaning out clutter ensures your home — and your mind — are ready for the next stage of life.
3. You Want to Boost Your Quality of Life
From your basement to the attic, decluttering increases productivity in every part of your house. Rather than letting piles of stuff accumulate in your home, get rid of it so you can use each room for what it’s made for. Once you’ve decluttered, you can actually enjoy a TV show in your family room and focus on work projects in your home office.
Why Is Decluttering Important?
It’s easy to think decluttering is just making room in your home and getting rid of junk. But there’s more to it than that. Organizing your house and clearing away clutter also supports your mental well-being. Here are just a few benefits of decluttering, though there are plenty more:
Clutter-Free Spaces Reduce Stress
Organizing and decluttering relieve stress for many people by providing a sense of control and accomplishment. In our survey, 61.7% of respondents said decluttering reduced their overall stress level. When you feel less stressed, you’re more inclined to be productive in other areas of your life.
Cleaning Out Clutter Gives You More Living Space
Clutter takes up more space than you probably realize. Items you don’t use or that don’t bring value to your life shouldn’t crowd your home. By purging clutter from your house, you’ll make more room for your family members and things you actually use. Plus, since decluttering relieves stress, you’ll have a clearer head space as well.
Less Clutter Improves Organization
Without piles of junk lying around, your home will feel clean and orderly. It’s easier to find a place for your belongings if you don’t have as many of them.
5 Essential Rules for Decluttering
Never decluttered before? It can feel overwhelming at first, especially if you don’t know where to start or when to stop. Use the following five rules to complete your decluttering project with ease.
1. Make a Decluttering Plan
Before tackling your decluttering project, set a tentative timeline and specific goals for yourself. Decide which room you’ll clean out first, which one you’ll tackle last and what you plan to accomplish in each room.
2. Give Everything a Home
As the saying goes — a place for everything and everything in its place. All your belongings should have a designated spot to keep rooms and surfaces tidy. If you can’t find a place for something, it’s probably best to get rid of it or create space for it by getting rid of something else.
3. Set a Stopping Point
You shouldn’t rush to declutter your house in one fell swoop. Take breaks while you declutter so you don’t burn yourself out or get discouraged. Cleaning out clutter isn’t a race, and reaching your end goal of having an organized home is much more important than how long it takes you to get there.
Try setting a timer for 15 minutes then take a break, or clean out one drawer each day. Looking at the big picture can feel overwhelming, but completing small decluttering projects one at a time gives you the boost to keep going.
4. Forget Feeling Guilty
It’s not uncommon to feel guilty when you declutter. This is especially true if you’re getting rid of sentimental items or gifts. It’s okay to acknowledge those feelings as you complete your decluttering project, but remember that hanging onto clutter will cause a different kind of guilt.
If you’re feeling bad about getting rid of something you don’t use, but that has meaning to you, consider selling or donating it. This way, you know that the next person who owns that item is truly enjoying it. If you do sell a gift or sentimental item, putting the money to something else meaningful to you can help you preserve the good memories, while letting go of the guilt.
5. Declutter Regularly
Decluttering isn’t just a one-time thing. To keep that minimalistic vibe you're after, declutter for 10 minutes each day. If that’s not feasible for you, try to clean out and organize your home every two weeks or once a month. This keeps clutter manageable and keeps you from feeling overwhelmed.
10 Key Tips for Decluttering Your Home
To mentally prepare for purging your house of junk — which is often the hardest part of the process — keep these decluttering techniques in mind while you’re working:
1. Follow the 80/20 Rule
Generally speaking, 80% of the time, you only wear 20% of the clothing you own. This rule tends to be true for other things as well, such as video games, computers, electronics, books, DVDs, toys and more. Your mission is to get rid of the things you don’t use 80% of the time.
2. Forget About Sunk Costs
In economics, money you’ve already spent that can’t be recovered is considered a “sunk cost.” Since you can’t get your money back on the items you bought, you should only think about the value they can add to your life. For instance, some people are reluctant to sell expensive kitchen appliances even though they never use them. Take a Kitchenaid, for example. It may have cost a pretty penny upfront, but if you’re not using it, getting it off the counter will give you more space to cook, improving your quality of life now.
3. Start With Small Projects That Feel Big
Feeling overwhelmed about how to start decluttering? Before you commit to decluttering an entire room, start with a few small projects that will give you a sense of accomplishment when you’re done. This will help build motivation to tackle lengthier jobs and eventually lead to a big change in your clutter level.
4. Clear Off Flat Surfaces
Countertops, shelves and other flat surfaces are clutter magnets. If you need to keep a few things out on your counters, that’s OK, but you should make it a goal to free all surfaces of most clutter. Make space in drawers, or add small boxes or bins to your shelves for paper items. You can keep frequently used small appliances on your kitchen countertops, but the rest should be put away or donated if they’re rarely used.
5. Keep Similar Objects Together
When decluttering your home, it’s important to categorize things as you go through them. Keeping like-things together forces you to organize the house and will make your daily life easier. Store each category of item close to where they’ll be used, so you know where they are when you need them. For example, keep office supplies in a tote in your home office or children’s toys in labeled bins in your basement.
6. Check if the Items Work
If a certain treasure you found stashed away doesn’t function properly, get rid of it. If you want to fix it (and are confident in your skills to do so), then fix it right away. Otherwise, it will continue to sit unused, collecting dust.
7. Track Which Items You Actually Use
Follow this useful decluttering tip for clothing, books and DVDs. Over the course of a year, when you use or wear an item, put it back facing the opposite direction of the others. This allows you to see what you’ve used and what you haven’t. If you haven’t used or worn something at the end of the year, get rid of it.
8. Think of the Last Time You Needed It
If you come across something you haven’t used in the last six months, you should probably get rid of it. If you pulled the item out and said, “I’ve been wondering where this was!” you should probably get rid of it. And if you didn’t even know you still had the item in question, you should definitely get rid of it. You didn’t miss it enough to warrant keeping it in your home.
9. Ask Yourself If You Love It
This tip may seem obvious, but sometimes we keep things we aren’t totally crazy about. Think about a time you spent money on something you didn’t love, but didn’t return to the store. If you don’t love an item, and you haven’t used it for more than six months, add it to the “Get Rid Of” bin.
10. Sleep On It
Once you’ve made the decision to get rid of all your home’s clutter, sleep on it. If there’s anything you can’t live without, you’ll know by morning. You can pull it out of the junk bin and put it away where it belongs.
“If you don't know where to start, we recommend decluttering room-by-room! Start with the most high-traffic area in your home – probably the kitchen or family room – and go through the decluttering process of deciding what to keep, toss or donate.
It's important to prioritize your most-used rooms first, so that you start feeling the positive effects of organization as soon as possible! Once you start with one room, the rest will get so much easier!”
Jamie Hord, Founder of Horderly

How to Start Decluttering
1. Set Goals and a Timeline
Before you get started, make a plan. No matter how much clutter you have to sort through, starting with specific goals will help you reduce frustration and roadblocks. Here are a few things to consider as you decide where to start decluttering:
- Write down or draw a map of all the rooms and “clutter hot spots” you want to tackle.
- Give each space a grade based on the severity of the clutter to help you prioritize your time. For example, on a scale of 1 to 3 (3 being the most cluttered), a particularly messy room or closet would get a 3.
- Tackle one room or space at a time.
- Set completion dates for each phase of your cleanup and choose timelines that are attainable. Creating a declutter challenge for yourself that feels like a game can help you avoid frustration throughout the process.
- Plan out times to work on specific areas when you expect decluttering to take longer than a few hours, such as the basement or garage.
“[Your decluttering timeline] all depends on how much time you have available and your motivation to get organized. If you’re a reluctant organizer, start with one drawer or one cabinet. That will give you the quick ‘win’ to move on to other spaces.”
Ashley Murphy and Marissa Hagmeyer, Co-Founders of NEAT Method

2. Create a Sorting System
As you go through the rooms in your home, you’ll need to set up a system for sorting the items you find. You can create your own method, or use the popular Three-Box Method. The Three-Box Method forces you to make a decision item-by-item and avoid making a bigger mess than the one you started with.
Gather three boxes or storage bins and label them as “Keep,” “Get Rid Of,” and “Put In Storage.” Use these decluttering tips to sort your items:
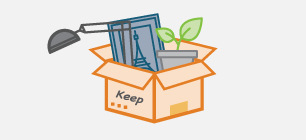
Keep: Items that are useful in your daily life.
Empty this box after you complete each space, putting items in their newly designated home. Ideally, these things should be stored neatly in a container or drawer and labeled.

Get Rid Of: Items that you no longer have a use for.
Empty this box after you complete each space, and decide whether you’ll donate or throw each item away. Store any items you’re giving away or selling outside the home – either in the vehicle they’ll be transported in, or a storage bin in the garage.

Put In Storage: Seasonal or sentimental items.
Empty this box into storage containers after you complete each space. Label storage containers or drop an inventory sheet on top, and neatly stack them in a designated storage area.
3. Purge Clutter From Your House
There are a few options for disposing of items in your “Get Rid Of” box:
- Donate or Freecycle: Have peace of mind knowing that something you no longer need is going to a new home with someone who does need it. You can donate clothes, shoes and other household items in good condition to a number of local charities. Before dropping off donations, make sure to check the charity’s guidelines for accepted items. You could also try posting to freecycle.org or a Facebook resale group, and people in your area can come get the items.
- Recycle: Recyclable glass, plastics and paper can go straight into your recycling bin if your neighborhood offers curbside pickup. Otherwise, put your recyclables in bags and take them to your nearest recycling drop-off location. Make sure these items are recyclable before dropping them off.
- Have a Garage Sale: If you’re up to the task, you may be able to make some money off your clutter by hosting a garage sale. Check with your neighbors or homeowners association to see if there is a designated garage sale date for your neighborhood.
- Rent a Dumpster: Not everything will be in good enough shape to donate or sell. Renting a dumpster is an affordable, stress-free option if you have a lot to get rid of or have larger household items you’re throwing away. We can help you out with this one — we’ll deliver the dumpster to your driveway, you can fill it up at your own pace and we’ll haul it away. Get a free quote on a dumpster rental for your decluttering project.
Ready to Rent a Dumpster?
Room-by-Room Declutter Checklist
You have the tools you need to tackle any decluttering project in your home — now it’s time to move onto our step-by-step declutter guide for every room. Planning it out room by room is the most efficient way to organize and declutter, and most rooms can be completed in the span of a weekend.
How to Declutter Your Bedrooms
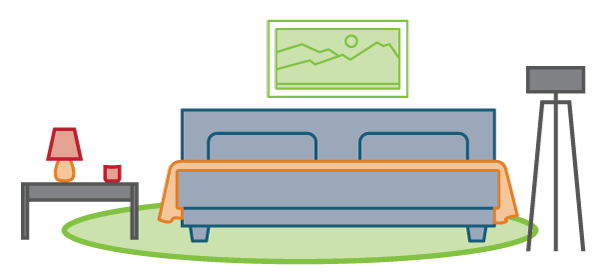
Bedrooms often become dumping grounds for stuff that doesn’t have a home in any other room. According to our survey, the bedroom is ranked as the #1 most cluttered room in the home. Realistically, you don’t need more than a bed, nightstands, and storage for clothes, shoes, jewelry and makeup.
Depending on the clutter level, it will take you anywhere from an afternoon to a full weekend of work to clear out and organize your bedroom. We’ll address closet decluttering in another section, as this area has its own unique challenges that are separate from the bedroom.
Start by Decluttering Drawers
Take everything out of your drawers, and ask the following questions about each item:
- Does it belong in the bedroom?
- Have you used or worn it in the last year?
If you answered, “no” to either of those questions, put the item in your “Get Rid Of” bin or move it to the room where it belongs.
Once you’re ready to place the items back inside the drawers, try adding dividers or small containers so you can store like-things together. You can get creative and repurpose small gift boxes, shoe boxes, cereal boxes or plastic containers as drawer storage systems. You can also add shelf paper to make cleaning the drawers easier in the future.
Keep Flat Surfaces Clear
Or, at least keep flat surfaces almost clear. It’s okay to have a few decorations, a lamp or pictures on top of your dresser or night stand. Try to limit each surface in the bedroom to less than five things on top. When you have less things cluttering the flat surfaces in your room, the space will feel more calming and peaceful.
Utilize Storage Bins for Seasonal Items and Toys
Let’s face it – not everything can be tucked away behind a closed door. Closets are valuable real estate in a home, so certain items like kids’ toys or seasonal clothing and bedding often need to be stored somewhere else.
Kids’ toys can be kept in baskets, toy chests or even shelves in the bedroom. If you find yourself running out of space for toys, it’s probably time to donate the ones that were maybe a hit for a few weeks but no longer get attention.
Seasonal clothing, bedding and decorations can be easily stored in plastic or cloth bins that fit under the bed or in a closet. Space-saver bags and comforter bags are also an option if you’re looking to fit bulky items into a smaller space.
"Ask yourself if an item sparks joy. If it does, you will feel light and joyful. However, if something feels heavy or confusing, then it's a sign that you have an attachment to the past ("I have to keep this because my mom gave it to me.") or a fear of the future ("What if I need it again?").
When you only choose to keep what sparks joy and support your ideal lifestyle, your home becomes a place that recharges you emotionally, makes you feel happier living in it, instead of being draining and overwhelming."
Ann Dooley, Gold Certified KonMari Organizing Consultant & Owner of Simple Joy With Ann

Additional Bedroom Decluttering Resources:
How to Declutter Your Closet
Decluttering your closet is therapeutic. The process of going through clothes, shoes and other forgotten belongings doesn’t only declutter your house. It can also cleanse your mind of any emotional baggage that may be connected to these items. This task can usually be tackled in an afternoon, though overstuffed walk-in closets may take up to a week of decluttering sessions.
Be sure to have your “Keep,” “Get Rid Of,” and “Put In Storage” bins nearby as you follow these steps to declutter your closet.
Declutter Your Closet From the Bottom Up
Most people’s first instinct is to begin from the top with hanging items, but starting the cleanup by clearing out the mess at the bottom of the closet is actually the more efficient way to go. Not only will you free up space to work, but you’ll feel like you’re halfway done with the closet in no time at all.
“Our favorite Horderly tips for organizing bedrooms and closets is to streamline hangers with slim velvet hangers — these allow for more space on hanging rods, and the synchronized look provides a level of tidiness and comfort," says Horderly. We also love to file fold any items in drawers and use drawer dividers to ensure categories stay together and folds don't fall apart."
Get Rid of Clothes and Shoes
Going back to our general decluttering tips from earlier in the post, it’s essential to follow the 80/20 rule when clearing out your closet. Since we typically wear 20% of our clothes, 80% of the time, there should be a significant amount of clothing you can purge.
Having trouble deciding what to toss out? Ask yourself these questions about each item:
- Does it fit?
- Is it damaged, stained, torn or faded?
- Has it been worn in the past year?
If you answered, “no,” to any of these questions (or if you answered, "yes," to question #2), the item should go in your “Get Rid Of” bin. Seasonal clothing and infrequently worn items with sentimental value should be put in a storage bin to free up space in your closet. The same goes for shoes and jewelry.
Even after performing this exercise, you’ll probably end up hanging onto items that you probably should’ve tossed. Once you’ve finished your initial decluttering, try the “backwards hanger” trick to weed out any other items that can free up space in your closet. Start the year with all the hangers’ tips facing the front of the closet (backwards). After you wear something, put it away with the hanger facing the back of the closet. At the end of the year, you can easily identify the clothes that aren’t worth hanging onto any longer.
Clean Up Closet Shelves
Remove everything from your closet, wipe down the shelves and then get rid of anything that isn’t adding value to your life. Avoid stacking clothes and storing stuff on shelves that can get buried behind hanging clothes. Aside from the items you store in containers, you should be able to see everything in your closet without moving too much out of the way. Use the space on your shelves to store smaller items in boxes and bins.
If you’re decluttering a closet that’s not used to store clothing, it can be tempting to stack everything inside like a beautiful game of Tetris. Don’t do it. Consider adding more shelving above the items kept on the floor, like vacuums or storage bins. You can also add hooks inside the door for brooms, mops and dustpans.
“In every closet, there is precious dead wall space that is begging to be utilized. I love back of the door organizers for keeping smaller items contained and accessible, as well as hanging command hooks on an empty wall for hats, umbrellas, bags, or any other grab and go accessory. These little areas free up precious drawer or shelf space, and keep items we may otherwise forget about visible, and in rotation.”
Laura Kinsella, Professional Organizer and Founder of Urban Organyze

Cleaning up your closets will improve your quality of life. You’ll save time when you no longer have to search for items you “could’ve sworn were in there,” and make room for new belongings that bring you more joy. Plus, you can save yourself the risk of items falling on you the next time you open a closet door.
Additional Closet Decluttering Resources:
How to Declutter Your Living Room
The main purpose for any family room or living room is to relax. If the area is cluttered with toys, books, wires, blankets, old magazines and more, it can be difficult to truly unwind. After bedrooms, the living room ranks as the second most cluttered space in the home.
Like many homes, your living room is probably in need of a refresh. Follow these decluttering tips to take back your relaxing family space over the span of a weekend.
Un-Decorate and Remove Items That Don’t Belong
It’s possible you simply have too many things in your living room, which is making it feel cluttered and overcrowded. Hanging pictures and adding floating shelves to the walls will remove collectibles that are crowding your tabletops. Streamline the number of throw pillows and blankets you have down to a few statement pieces.
A lot of things find their way into this frequently used space over time. Start by removing any items that have lost their way and belong in another room. Look for toys that belong in kids’ rooms, mail or magazines that belong in the office and glasses or dishware that may not have made it back to the kitchen.
It’s also likely that you have a surplus of books, CDs, DVDs and other entertainment items you haven’t looked at in ages taking up space in the living room. Sort through these items, and donate or sell anything that’s no longer a staple in your collection. If you can, convert your music and movies to a digital format. This will free up a lot of valuable real estate in the room without having to part with something you’d otherwise keep. Get rid of any broken or unused toys, remote controls, or anything else that has lost its usefulness.
Add More Storage
As you work on decluttering the living room, you may find yourself with an overabundance of items that DO belong in this space. Here are a few simple storage solutions to provide a new home for any clutter in the room:
- Add baskets to hold frequently-used toys and blankets.
- Install shelving for video games, DVDs and other media that is prone to sitting out in the open.
- Look for storage furniture, such as ottomans and trunks, to stow away anything you don’t want out in the open. There are even models of couches and loungers that serve a dual function as storage.
- Get other furniture that can double as storage space. Consider an entertainment center with shelves and cupboards or a behind-the-couch chest.
Wrangle the Wires
The mess of wires around your TV is an eyesore, adding visual clutter to your family room. There are many products available to help you tie up and hide your cables, but here are a few tips for managing cords:
- Use cords and cables that aren’t excessively long – you shouldn’t have to tie up 20 feet of coaxial cable!
- Choose furniture that will cover up the cords if you don’t want to go through the trouble of feeding them into the wall.
- Store your mess of extra cords in a container that matches your room décor.
- Conceal some cords in the room with an area rug.
Sometimes there’s no way to get rid of cords, so at least you can hide them in clever ways!
Additional Living Room Decluttering Resources:

How to Declutter Your Home Office
Getting distracted by all the clutter surrounding you? Take back your workspace in a single afternoon with these decluttering tips, so you can get organized and be more productive in your home office.
Sort Through Paper Items
Even if you don’t have a home office, you probably still have office clutter. For most people, this consists of important documents, piles of bills, receipts and other pieces of paper you intended to get to. When decluttering an office or workspace, it’s best to start with paper items. Cleaning up the paper mess is likely half the battle!
Start organizing your office by sorting papers into three piles: “File,” “To-Do” and “Trash.” Once you have everything sorted, immediately file the papers you need to keep. Then put your to-do pile in a basket or file folder so you can address it once you’ve cleaned up the office space, and throw away or shred the trash pile.
Here are some other decluttering tips for stacks of papers:
- Scan important documents and receipts to make a digital record, then shred and throw away the paper if you don’t need to hang onto a physical copy.
- Store older paper files, such as taxes, in a plastic bin in your basement, garage or another space you don’t need to access often.
- Designate a space for important mail or paper documents that you need to act on soon, or for incoming documents in the future. This way, you’ll have a place to put them when they arrive.
Clear Off Your Desk and Organize Drawers
Challenge yourself to remove most items from your desk, aside from the computer, a lamp and a few other essentials. Only keep items on your desk that you use frequently. A few knickknacks are okay, but don’t overdo it!
Whenever possible, you should store office supplies in drawers. To ensure your office drawers don’t get junked up, here are three simple steps to make sense of your office supplies:
- Take everything out of the office drawers.
- Get rid of the excess. If you have more than you’ll need in the next year, get rid of it. If you haven’t used an item in six months, you should also probably get rid of it.
- Organize like-things together and avoid having too many free-floating objects in a drawer once you put them back inside. You can purchase drawer organizers, or use small boxes or containers you already have.
“Once you edit down your paperwork, use hanging file folders with labels to keep the categories organized. If you don’t have a file drawer, you can purchase a file box instead.
We love using drawer inserts to keep office supplies in place. Be sure to measure your drawers for the best fit and keep your space looking NEAT by using the same style of pens, pencils, paper clips, etc.
Place a sectioned collator on your desktop to separate incoming mail, outgoing mail, bills to be paid, stamps, etc. This will give all these items a place rather than piling up on your desk.”
Ashley Murphy and Marissa Hagmeyer, Co-Founders of NEAT Method

Tame Your Cords
While not an essential step for organizing your home office, wrangling your cords will help you achieve a clean, crisp look. A simple online search will bring up plenty of cord management products, and you can use a few of these clever cord hacks:
- Label cords with tape, so it’s easier to tell which cord goes with each device.
- Hold up cords that are frequently unplugged on your desk using binder clips.
- Use twist-ties or rubber bands to tie up excess cables. It won’t be fancy, but it’s effective!
Additional Home Office Decluttering Resources:
How to Declutter Your Kitchen
The kitchen is usually used more than any other room in the house, and if you cook on an even semi-regular basis, there’s a lot of stuff in it. Dishes, cookware, utensils, small appliances, food, spices and more are competing for space in your kitchen. And, there are many places where this clutter can build up, like kitchen cabinets, drawers and countertops. Take back the space in a weekend, and make cooking less stressful with these kitchen decluttering tips.
“In the kitchen, creating structure is key!
Use drawer dividers to separate cutlery and cooking tools, and use products like a cookware rack and lazy Susans to make sure everything has its own place and is easily accessible.”
Jamie Hord, Founder of Horderly

Start by Decluttering Countertops
In most homes, kitchen counters are clutter-magnets, so this is a great first step for decluttering the room. These two simple actions will make a big improvement:
- Clear everything off the counters except for 3-5 essential items, such as a coffee maker or knife block. You can put the clutter on the kitchen table or floor, but get it off the counter to start.
- Put away or find a new home for everything you cleared off the counter. If you’re left with a lot of papers or junk mail, either throw them in the trash or move items that need to be addressed to your office.
This decluttering project could take only a few minutes, or an hour if your counters are really cluttered. This quick first step will make it feel like you have a new kitchen once you’re done.
Divide the Kitchen Into Zones
To avoid a potentially bigger mess, we recommend decluttering one section of your kitchen at a time. Assigning zones can also help you improve your kitchen organization once you put things away.
- Designate the space near the stove for cooking utensils, pots and pans. These items should be conveniently located near where you cook.
- Unless you bake every day, store your baking supplies away in a cabinet or on a shelf. If you have a mixer on the countertop, try to corral your baking supplies near it.
- Storage bags, cling wrap, aluminum foil and similar items should get their own zone, as well as cleaning supplies.
Purge and Relocate Items
As you declutter your kitchen, consider throwing away or donating any items that haven’t been touched in a year. If you decide to keep an infrequently used item, you may want to put it in storage in another part of your home – especially if you’re low on real estate in your kitchen. Remember to move anything that belongs in a different zone to its new space.
- Small Appliances: If you only use that food dehydrator or deep fryer once a year, you should put it in your “Get Rid Of” bin. Inventory all the small appliances you have, and only keep what you really use. Appliances that have multiple functions tend to be keepers.
- Plastic Storage Containers: If you’re hoarding enough plastic storage containers to open your own take-out restaurant, it’s time to purge. Start with the lids – there always seem to be fewer lids than containers – and match each one up to a bottom. Get rid of any stragglers you come across. You can keep some spare containers in the kitchen, but if you’re left with a surplus, consider keeping them in storage outside the kitchen.
- Pots and Pans: Chances are you only have so many burners on your stove that you can use at once. Do you really need all the pots, pans and cookie sheets you have in your cupboards? Unless it serves a special purpose and you use it frequently, you should donate duplicate pots and pans. Besides, when was the last time you used your wok?
Keeping things simple is the key to limiting the chaos in this high-traffic space. If you’re having second thoughts about tossing some kitchen tools, try storing them away in a box and see if you really need them over the next year. If not, take that box straight to Goodwill.
Additional Kitchen Decluttering Resources:
How to Declutter Your Bathrooms
Decluttering the bathroom is pretty straightforward. You’ll need to purge and organize the items taking up space on your countertops, shelves and inside drawers. You may be surprised by what you have and how much you have of it as you sort through everything. And you can get this space in order with one afternoon of work.
Pull Everything Out and Toss the Excess
Start by clearing off your bathroom counters, emptying drawers and completely cleaning out linen closets in or near your bathrooms. Some experts recommend decluttering multiple bathrooms at once to really get an idea how much excess you have. You may have enough soap to last you for two years and not even know it!
If you’re holding onto a product that only has a little bit left, give yourself a month to use it – if you don’t, throw it away. Have more towels than you will use in a month? Consider donating them to a local animal shelter. And if you’re keeping something you never really liked, such as that bath bomb set or fancy soaps, you should pull the trigger and get rid of it.
Put Like-Things Together
Once you have all items out, begin grouping like-items, even if they came from different bathrooms. Make piles for things like medicine, towels, toiletries, cleaning supplies and makeup. This will help you take inventory of what you have and what might be cluttering up your space. For multiples of the same thing, combine them and clear out empty bottles or packaging.
Set Up Organization Systems
Dividers, drawer organizers, small boxes and baskets are essential for bathroom organization. There are a lot of small items floating around the bathroom, so it’s important to keep those like-item groups together in a neat way. It’s so much easier to get ready in the morning when you don’t have to dig through drawers to find something you need. Organizing the bathroom doesn’t have to cost you money either. Look for small boxes or plastic containers around the house that you can repurpose as drawer organizers.
Similar to other spaces in the home, your goal is to remove as many items from bathroom countertops as possible. If you have items you use daily, you should organize them neatly on a tray or shelf, or put them into an easily-accessible drawer.
“First and foremost, get rid of any products you don’t actually use.
Then assess the vertical space under the sink, which is typically the least utilized area in bathrooms. Make the most of this space by purchasing stackable drawers or stackable acrylic bins with lids. You will be surprised how much more you can fit! Be sure to add labels to each drawer or bin, so you know what is inside and can maintain the system you create.”
Ashley Murphy and Marissa Hagmeyer, Co-Founders of NEAT Method

Additional Bathroom Decluttering Resources:
How to Declutter Your Laundry Room
Everyone’s laundry room is different, so our advice for decluttering this space is less specific than the other rooms in your home. Some people have their washing machine and dryer in an unfinished basement or a mudroom off the garage. A lucky few have a laundry room on the second story, closer to where clothes generally live, but in a higher traffic space.
These different setups create many more scenarios for laundry room clutter. But no matter what types of clutter plague your laundry room and what other uses the area has, these laundry room decluttering tips will ring true. You can get this space in tip-top shape over the span of a few hours to a weekend.
Get Rid of Items That Don’t Belong
Anything being stored in the laundry room that you don’t need to do laundry should be moved elsewhere. These out-of-the-way shelves may seem useful for storing craft supplies or miscellaneous junk. But keeping odds and ends in a space designated for laundry is adding to your overall clutter problem.
Organize Items With Shelving, Bins and Baskets
Sort like-items that do belong in the laundry room together, and put them away in baskets or well-labeled bins. Install some sturdy shelving to keep these baskets and bins organized. You can also try storing detergent and fabric softener in glass jars or beverage dispensers to improve the aesthetic if this space is in a high-traffic area of your home.
“Use glass jars to decant your cleaning supplies to minimize the visual clutter from the bold graphics on their packaging. Doing laundry feel less of a chore when the space feels clean and inviting.”
Ann Dooley, Gold Certified KonMari Organizing Consultant & Owner of Simple Joy With Ann

Make a Plan to Keep the Room Tidy
Once you have organization systems in place, you should make an effort to keep things that way. First, keep clothes off the laundry room floor. Any clothes in the laundry room, whether they’re dirty or waiting to be folded, should be kept in a hamper or laundry basket.
You should also avoid storing items on top of the washer and dryer. Remember the declutter mantra: “Keep flat surfaces clear.”
Additional Laundry Room Decluttering Resources:
How to Declutter Your Basement or Attic
Clutter can live forever once it’s been banished to a basement or attic. The saying, “out of sight, out of mind” definitely applies to these storage spaces. When addressing basement or attic clutter, you should set aside a good chunk of time – these typically aren’t hour-long projects.
Divide Area Into Zones and Clear Items Out
It’s important to work in one area of your attic or basement at a time. Start with a set of shelves, a stack of boxes, seasonal decorations or old kids’ clothes and toys. If you’re tackling shelves, clear the shelves. If you’re working through boxes or bins, empty them. Don’t move onto another zone until you completely finish the current one you’re working on.
As you work on each zone, sort everything into “Keep” or “Get Rid Of” bins. Since you’re working on spaces that are generally used for storage, you can assume that “Keep” and “Put In Storage” are the same for Three-Box Method sorting. You may consider an additional category for these spaces if you find broken items you intend to fix. Give yourself a deadline for fixing them – if you don’t meet it, recycle the items or throw them away.
Keep Like-Things Together and Toss the Junk
Before you start putting away the things you’re keeping, move the things you’ve chosen to part with outside of the house. If you’re throwing items away, throw them directly into your dumpster or trash bin. If you’re donating or selling any items, you should put them in the vehicle you’ll use to drop them off, or keep them on a porch or in the garage until they can be picked up.
Keep like-things together as you put items away to greatly improve your ability to find and access them when you need them later. Have more ornaments than you can fit on a tree? Try sorting your ornaments by color, so you don’t have to move as many boxes next year when you start decorating.
Organize and Sort Items Into Bins
As you put everything you’re keeping back into boxes and bins, be sure to clearly label the contents. If you don’t want to write directly on a bin, you can tape a paper list to the front so you have a visible inventory of what’s inside. You can also use a label maker to add semi-permanent, removable labels. Another option is to store items in clear bins, so you can see what’s inside more easily.
“[The best organization hacks for the basement are] clear stackable bins with lids. You want to be able to quickly identify the items inside and allow the whole family to be able to find what they need.”
Ann Dooley, Gold Certified KonMari Organizing Consultant & Owner of Simple Joy With Ann

Additional Basement and Attic Decluttering Resources:
How to Declutter Your Garage
From old sporting equipment and storage boxes to long-forgotten tools and rusty car parts, garages allow junk to hang around for much longer than it should. The garage is a space where most of the items you think you might use or need one day end up. While this is a challenging space to declutter, it’s not impossible!
Follow these garage decluttering tips over the span of a weekend or two, and actually use the space for parking your car again.
Take Everything Out and Purge
We recommend planning this decluttering project on a weekend with good weather. It’s important to try pull every single item out of the garage and sort through them. There may be a few extreme cases where this isn’t possible, but you’ll set yourself up for the most success if you start by completely clearing out the garage.
Categorize items as you go through them, and get rid of duplicates you don’t plan on using in the next five years. Either sell these items or give them to a friend who could use them. If you’re holding onto anything that’s worn or damaged, you should probably get rid of that too.
Sort Through and Categorize Your Items
After you’ve decided what you’re going to keep, determine what categories should be stored together before you put them back. Put all of your tools together, sporting equipment together, gardening equipment, hardware, etc. But don’t put them back in the garage until you’ve found an organized place for everything.
NEAT Method’s Ashley Murphy and Marissa Hagmeyer advise, “Create zones in your garage. Store holiday decor together in one area, camping gear in another, ski apparel and equipment in another, etc. Then you can easily know where to go when you need to access a particular category.”
Add Storage and Organization Systems
In order to maximize space, you may need to purchase more storage bins, a tool cabinet, or a pegboard for hanging things. You can also install sturdy shelving to take advantage of unused vertical space. Whenever possible, create storage space that is up and off the ground to make the most of the room in your garage. Clearly label every box, bin or drawer so you can easily identify the contents.
“Make the most of your wall space by assembling multiple storage racks. Decide on one style and stick with that through the space. Once you have your racks put together, buy matching containers to create visual cohesion and make storing the bins easier. Then uniformly label every container so there’s no guessing.
Slatwall systems are easy to install and come with a variety of options to hang various items such as bikes, golf bags, sports equipment and gardening tools."
Ashley Murphy and Marissa Hagmeyer, Co-Founders of NEAT Method

Additional Garage Decluttering Resources:
Keep Your Home Decluttered for Good
After all the effort you’ve put into decluttering your home, be sure to keep these simple tips in mind to prevent clutter from returning in the future.
Don’t allow potential clutter into your home in the first place.
Before purchasing or acquiring anything new, ask yourself, “Do I really need it?” and “Where will I keep it?” If you don’t have an immediate answer to those two questions, don’t bring it home.
Declutter a little bit each day.
Deal with common clutter such as mail, clothes and toys every day. By setting aside 20 minutes each day, you’ll avoid having to spend hours cleaning up in the future. If making decluttering a daily routine isn’t doable for you, plan a weekly sweep instead.
Use the “one in, one out” rule.
When you bring something new home, throw away or donate something else. You can even implement this room-by-room, to make you think about where you’ll keep this new thing.
Don’t buy – rent or borrow instead.
If you only need an item once in a blue moon, consider renting or borrowing it. Whether it’s a book, movie or power tool, there are plenty of resources available. Borrow items from friends, the library or your local home improvement store.
“Always start by coming up with a vision of your ideal lifestyle. Imagine yourself waking up in the morning. What do your surroundings look like? For example, when you open the cabinet to get a mug for your coffee, what do you see? Move through your home and picture every detail and imagine how it feels in an organized space. This vision will become the motivation and guide to create a home that supports your ideal lifestyle.”
Ann Dooley, Gold Certified KonMari Organizing Consultant & Owner of Simple Joy With Ann

We’ve helped over 35,000 homeowners with decluttering projects in the last 2 years – let us help you too!
Contact Budget Dumpster for affordable junk removal.
or get a quote online today.
Meet Our Expert Contributors

Laura Kinsella - Urban Organyze
Laura Kinsella is a professional organizer on a mission to help moms simplify their homes and transform their lives. Based in New York, Laura helps families get rid of clutter, create more organized, efficient homes, and keep it that way! Her company, Urban Organyze, is all about finding personal organization systems that work for each family. Laura has been featured on A&E, Realtor.com, HGTV, the New York Post, and more providing her professional tips on how to get (and stay!) organized.

Jamie Hord - Horderly
Jamie Hord is the co-founder of Horderly, a home organization company that helps homeowners across the nation bring order to cluttered spaces. Horderly uses a proven 11-step decluttering process to create a clean, stress-free, organized space for every client. Jamie has been featured on Today, Martha Stewart, the New York Times, Real Simple, Good Housekeeping, and more.

Ashley Murphy and Marissa Hagmeyer - NEAT Method
Ashley Murphey and Marissa Hagmeyer are the founders of NEAT Method, a home organization company with over 100 locations nationwide. NEAT Method has also launched a collection of home organization products sold in stores like Crate & Barrel, Bloomingdales and Saks Fifth Avenue. Ashley and Marissa’s NEAT Method has been featured in The New York Times, Today, Vogue, Better Homes & Gardens, The Washington Post, Forbes and more.

Ann Dooley - Simple Joy with Ann
Ann Dooley is a Certified Master Level KonMari Consultant and the owner of Simple Joy With Ann. She brings a fresh, transformative approach to decluttering by combining organization strategies and she’s made Expertise.com’s list of Best Home Organizers in New York City for 4 consecutive years! She’s also been featured in The Wall Street Journal, New York Magazine, Vox, KonMari, and more.
